
Getting Started with Playwright and TypeScript
Playwright is an end-to-end testing for modern web apps. It supports multiple languages using Playwright API in TypeScript, JavaScript, Python, .NET, Java and cross-browser engines including Chromium, WebKit, and Firefox, cross-platform (test on Windows, macOS, Linux, locally or on CI), and headless or headed mode.
Prerequisites
- Node.js: You can download Node.js based on your operating system, or use NVM for managing multiple versions of Node.js.
- Visual Studio Code or any other code editor of your choice. I recommend using Visual Studio Code because it has many extensions that can help you with your development.
- Playwright extension for Visual Studio Code: Playwright Test for VS Code
Install Playwright
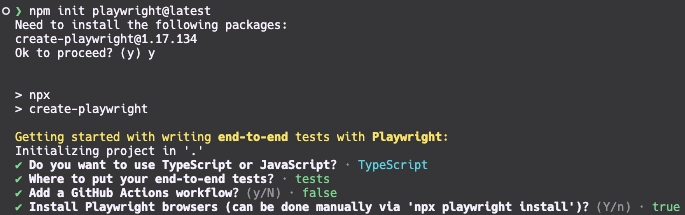
Create a new folder and open it in VS Code. Then, open the terminal and run the following command to install Playwright:
npm init playwright@latest
Then, select the following options:
- Choose a language: TypeScript
- Choose end-to-end tests folder: tests
- GitHub Actions workflow: false (Optional: If you want to use GitHub Actions for CI/CD, you can select this option.)
- Playwright browsers: true
After the installation is complete, you will see a Success ✨ message in your terminal, along with some commands to run tests.
npx playwright test
// Runs the end-to-end tests.

npx playwright test --ui
// Starts the interactive UI mode.

npx playwright test --project=chromium
// Runs the tests only on Desktop Chrome.

npx playwright test example
// Runs the tests in a specific file.

npx playwright test --debug
// Runs the tests in debug mode.

npx playwright codegen
// Auto-generates tests with Codegen.
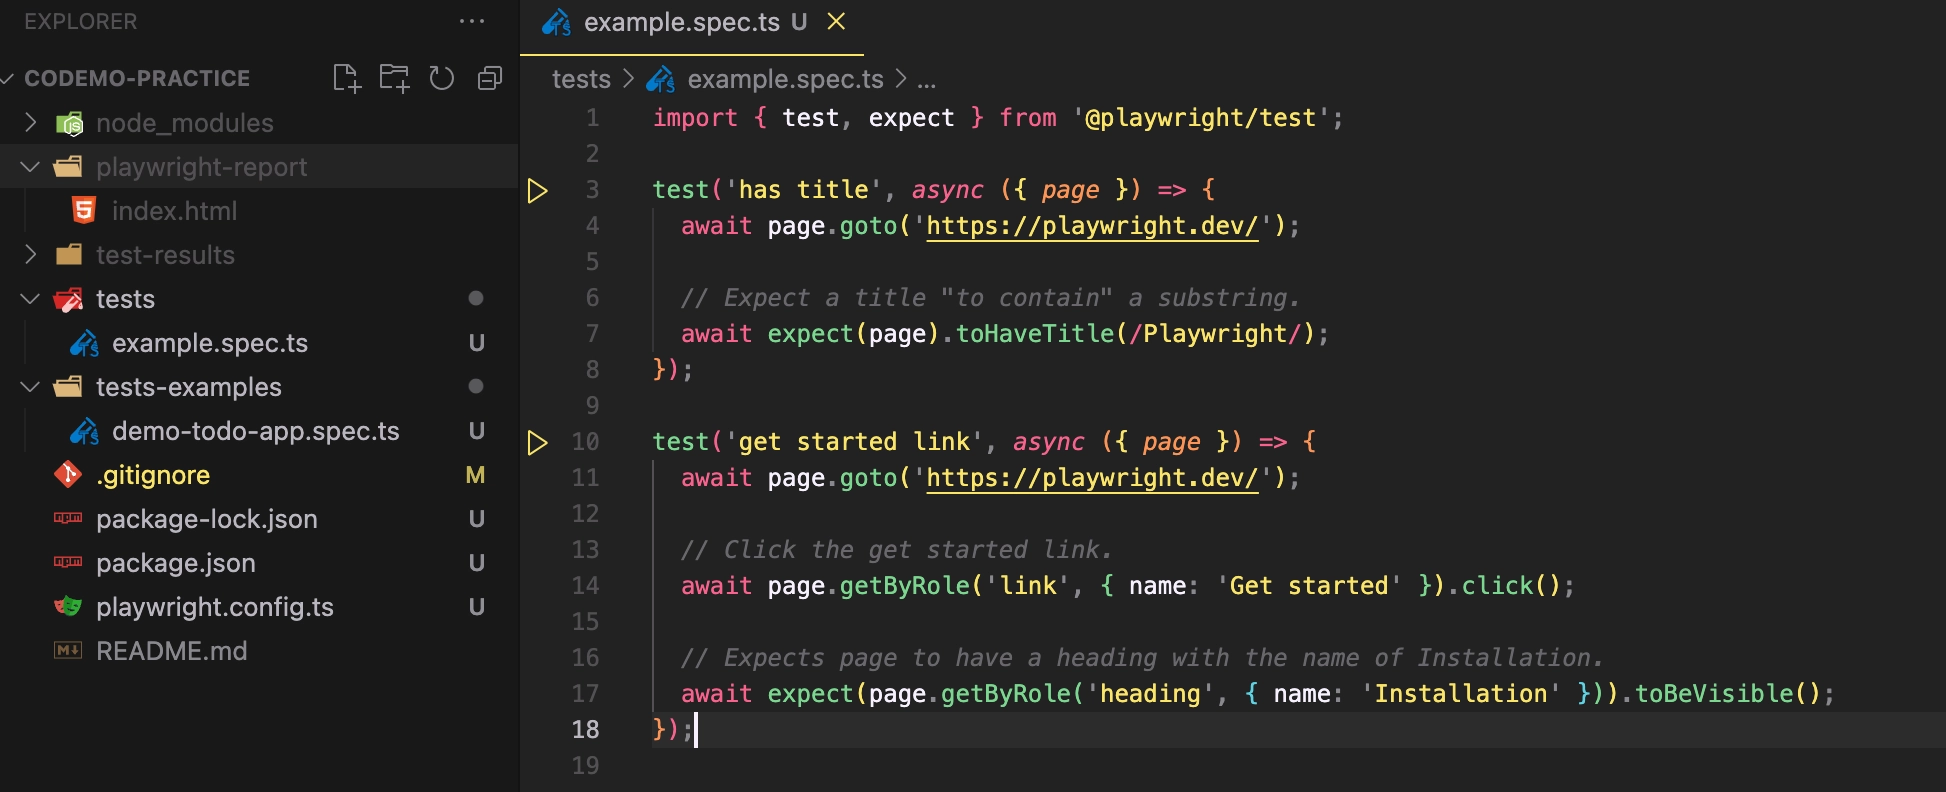
By default, Playwright will generate a folder structure like this:
.
├── node_modules/
├── playwright-report/ <-- Report folder
├── test-results/
├── tests/
│   └── example.spec.ts <-- Example test file
├── test-examples/
│   └── demo-todo-app-spec.ts <-- Example test file
├── package.json
├── package-lock.json
└── playwright.config.ts <-- Playwright configuration file
Run Example Test
Once you have installed Playwright Test for VS Code on VS Code, you can run your tests by clicking on the ▶️ icon on the left side each test cases.
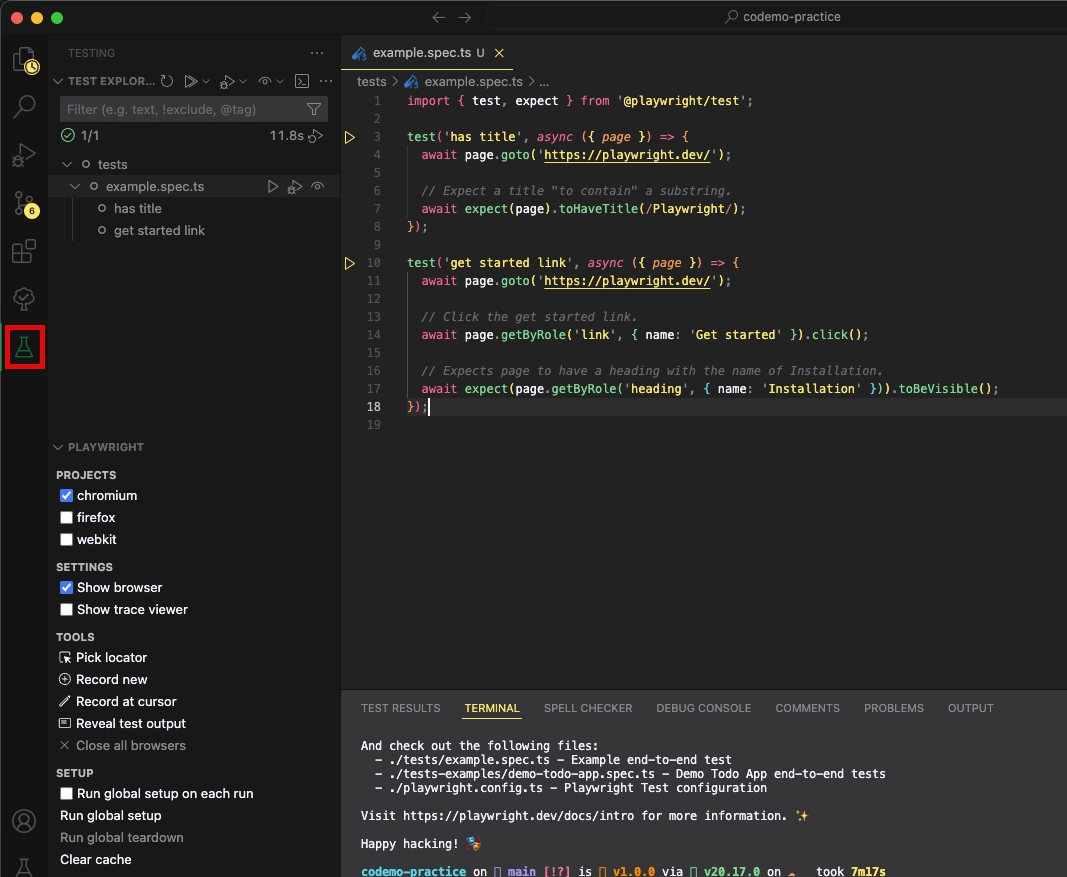
Or on the left panel, you will see the Test Explorer menu, where you can view/run test cases, configurations, settings, tools, and setup.
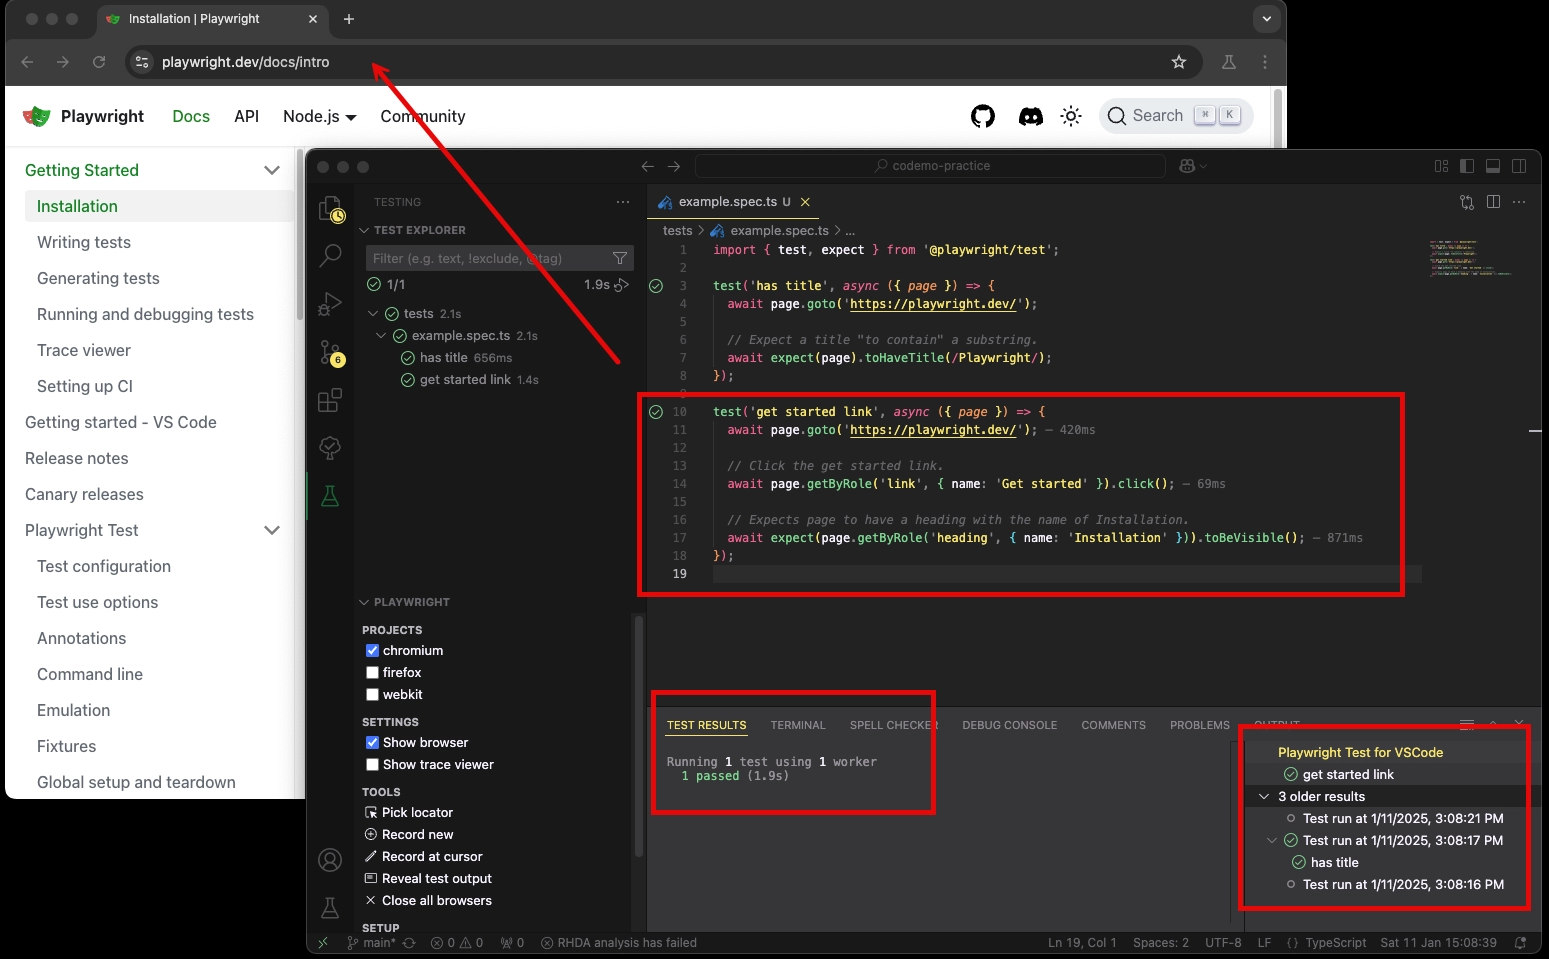
Now, click on the ▶️ icon to run the example test case get started link, then playwright will open the browser and run the test following the steps below:
- Go to the
Playwright website. - Click on the
Get Startedlink. - Verify the heading text is
Installation.
Write Your Test
Create a new file in the tests folder with the name my-first-test.spec.ts and add the following code:
.spec.ts extension for the test file. By default, Playwright will look for files with this extension to run the test. More information here.import test, { expect } from "@playwright/test"
test('Email should be visible', async ({ page }) => {
// Go to Codemo.dev
await page.goto('/')
// Click on the About link
await page.getByLabel('About').getByRole('link', { name: 'About' }).click()
// Expects page to have a heading with the name of Installation.
await expect(page.getByRole('link', { name: 'contact@codemo.dev' })).toBeVisible()
})
- Go to Codemo Practice E-commerce to practice more.
- Source code on GitHub
Run Your Test
Click on the ▶️ or run the following command in the terminal:
- Run a specific test file:
npx playwright test tests/my-first-test.spec.ts
- Run the test with the title:
npx playwright test -g "Email should be visible"
The two commands above will run the test case without opening the browser. If you want to see the browser running the test, just run:
npx playwright test -g "Email should be visible" --headed
Or run on a specific browser like Chromium:
npx playwright test -g "Email should be visible" --headed --project=chromium
To view the report:
npx playwright show-report
Conclusion
In this guide, you have learned how to set up Node.js, install Playwright, write and run the test. You can find more information about Playwright in the official documentation, and use my website Codemo.dev to practice automation test Practice E-commerce.